Which Programming Language Is Used For Web Building?

Which Programming Language Is Used For Web Building?

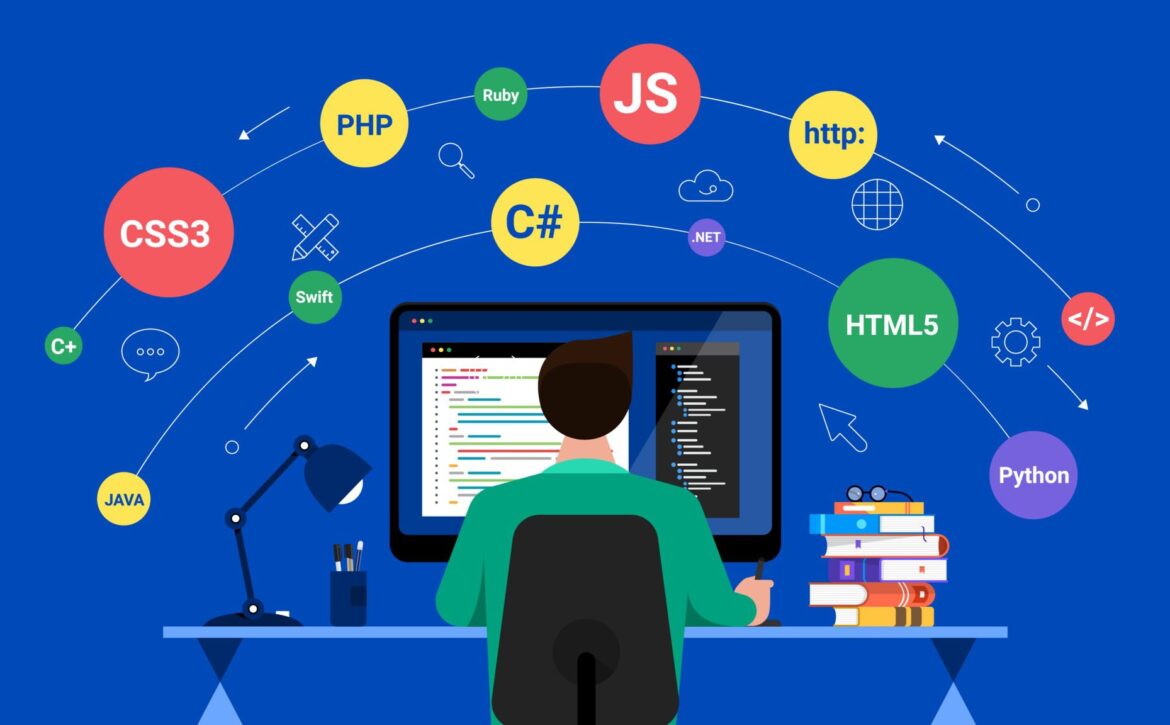
Are you planning to build a website but don’t know where to start with programming languages? With so many options available, it can be overwhelming to choose the right one. However, fear not! In this blog post, we’ll walk you through the most commonly used programming languages for web building and help you figure out which one suits your needs best. Whether you’re looking for basic functionality or advanced features, read on to discover which language is perfect for your web development journey.

HTML

HTML (HyperText Markup Language) is the backbone of web development. It’s a markup language used to create and structure content on the web. HTML uses tags to define elements such as headings, paragraphs, links, images, and more.

One of the best things about using HTML is that it’s easy to learn. Even if you have no programming experience at all, you can quickly pick up the basics of HTML and start building simple websites in no time.

Another advantage of HTML is its cross-platform compatibility. Whether you’re browsing on a desktop computer or a mobile phone, your browser can render an HTML page without any issues.

Moreover, with regular updates like the most recent version – HTML5 – developers have access to new features that enhance user experiences such as multimedia support and offline storage capabilities.

Learning basic knowledge of how to use HTML will provide you with essential skills for creating beautiful web pages; it’s definitely worth taking some time mastering!

CSS

CSS (Cascading Style Sheets) is a crucial programming language used for web building. While HTML provides the structure, CSS is responsible for the visual representation of a website. It allows developers to manipulate fonts, colors, layouts and more with ease.

One significant advantage of CSS is its ability to separate content from presentation. This means that developers can make changes to a website’s appearance without affecting its underlying code or text. Moreover, it streamlines website maintenance by allowing developers to modify multiple pages at once through external style sheets.

CSS also offers an array of layout options such as flexbox and grid systems which make responsive design easier than ever before. Additionally, CSS animations and transitions provide dynamic effects that enhance user experience.

Mastering CSS is essential for any front-end developer looking to create visually appealing websites while maintaining clean code separation and efficient workflows.

JavaScript

JavaScript is a scripting language that adds interactivity and functionality to web pages. It was designed to be used in conjunction with HTML and CSS, allowing developers to create dynamic websites with ease.

One of the primary benefits of using JavaScript is its versatility. Whether you want to add simple animations or complex interactive features, there’s almost no limit to what you can do with this programming language.

Another advantage of JavaScript is its popularity. As one of the most widely-used languages for web development, it has a vast community of users who have created countless resources and libraries that make it easier than ever before to develop high-quality web applications.

But despite its ubiquity, JavaScript isn’t without its challenges. One common issue faced by many developers is ensuring cross-browser compatibility – since different browsers may interpret code differently, some scripts may not work as intended on certain platforms.

JavaScript remains an essential tool for any developer looking to build robust and engaging web experiences.

PHP

PHP is a popular server-side scripting language that has been around since the late ’90s. It was designed specifically for web development and can be embedded directly into HTML code. PHP is open-source and free to use, making it an accessible choice for many developers.

One of the main benefits of using PHP is its versatility. Its ability to work with multiple platforms such as Windows, Linux, and macOS makes it an excellent choice for building web applications that need to run on different systems. Additionally, PHP has a vast community of developers who contribute plugins and libraries that make development even more comfortable.

Another attractive feature of PHP is its speed. As a server-side programming language, it runs faster than client-side languages like JavaScript because all processing happens on the server before sending information back to the user’s browser.

If you’re looking for a flexible language that can handle complex web applications while remaining fast and reliable, then PHP could be an excellent option for your next project.

Conclusion

The choice of programming language for web building mainly depends on what you want to achieve. HTML remains a fundamental markup language that every developer must learn. It provides the structure and content of your website.

CSS is essential in creating visually appealing websites by adding color, typography, layout, and other design elements. JavaScript brings interactivity to your website and enhances user experience through features such as animations, forms validation, and dynamic content loading.

PHP is a server-side scripting language used primarily for back-end development tasks such as handling databases and processing form data. It’s also widely used in developing e-commerce platforms like WordPress and Magento.

Ultimately, mastering one or more programming languages will give you an edge when it comes to creating high-quality websites that meet users’ needs. By understanding these languages’ strengths and limitations, you’ll be well positioned to choose the right tools for each project you undertake.

Read More
Author DM June 1, 2023 0 Comments

Website Design Ideas: 15 Exciting Ways To Find Inspiration

Website Design Ideas: 15 Exciting Ways To Find Inspiration

Are you looking for some inspiration to revamp your website design? Look no further! As a content writer and SEO expert, I know how important it is to have a visually appealing website. But sometimes, it can be hard to come up with fresh ideas on your own. That’s why I’ve compiled this list of 15 exciting ways to find inspiration for your website design. Whether you’re starting from scratch or just want to spruce up your current design, these tips will help you get started on creating an eye-catching and effective website that stands out from the crowd. So let’s dive in!

Where to find inspiration for website design

Finding inspiration for website design can be a daunting task, but it doesn’t have to be. There are plenty of resources out there that can help you get started on your creative journey.

One great place to start is by looking at other websites in your industry or niche. Take note of what elements they use that appeal to you and consider how you could incorporate similar features into your own design.

Another source of inspiration is social media platforms like Instagram and Pinterest. These sites are full of visually stunning content that can spark ideas for color schemes, typography, and overall layouts.

You might also try turning to art and design blogs or magazines for inspiration. Seeing the latest trends in graphic design or web development can give you fresh ideas for unique ways to showcase your brand through visuals.

Don’t forget about real-world experiences! Inspiration can come from something as simple as taking a walk outside or visiting an art museum. Keep an open mind and let yourself be inspired by the world around you!

Finding inspiration is all about keeping an eye out for new ideas wherever they may appear. By exploring different sources of creativity, you’re sure to find the perfect starting point for designing a standout website that reflects your brand’s personality and values.

How to use inspiration in website design

Finding inspiration for website design is one thing, but knowing how to use it effectively in your own designs is another. Inspiration can come from anywhere and everywhere – from nature to art, architecture to fashion. But incorporating that inspiration into a cohesive website design can be challenging.

One way to use inspiration in website design is by identifying the key elements that drew you to a particular source of inspiration. For example, if you’re inspired by a painting with bold colors and strong lines, consider how you can translate those elements into your website’s color scheme or layout.

Another approach is to think about the emotions or feelings that a particular source of inspiration evokes. Is it calming? Exciting? Sophisticated? Use these emotions as a guide when deciding on typography, imagery and other design elements.

It’s important not to simply copy what has inspired you; instead, use it as a starting point for creating something unique and original. Experiment with different combinations of colors, fonts and layouts until you find what works best for your specific project.

Remember that using inspiration in website design doesn’t have to be literal – sometimes subtle nods are all that’s needed. The end goal should always be crafting an effective user experience while staying true to your brand identity.

15 website design ideas

Are you in search of some inspiration for your website design? Look no further! Here are 15 website design ideas to get your creative juices flowing.

1. Minimalistic Design: A clean and simple layout can make a big impact.
2. Bold Typography: Use typography as a statement piece on your site.
3. Parallax Scrolling: Add depth and dimension with parallax scrolling effects.
4. Video Backgrounds: Engage visitors with a stunning video background on your homepage.
5. Geometric Shapes: Incorporate geometric shapes into the design for an edgy look.
6. Retro-Inspired Design: Bring back nostalgia with retro-inspired elements like bold colors, patterns, and typography.
7. Custom Illustrations: Stand out by incorporating unique illustrations that reflect your brand’s personality.
8. Split Screen Layouts: Divide content into two halves for an interesting twist on traditional layouts.
9. Cinemagraphs: Combine photography and video with cinemagraphs that capture subtle movements in still images.
10. Single Page Design : Provide all necessary information within one page without overwhelming visitors
11.  Responsive Design: Make your site responsive so it looks great on any device – desktop, laptop, tablet, or smartphone

12. Blog Style Design: Take a cue from popular blogs and create a blog-style design with easy navigation.

13. Customizable Widgets: Add a personal touch by creating customizable widgets for your site.

14. Pinterest-Inspired Designs: Use popular Pinterest designs as a source of inspiration for your own website.

15. Vector Graphics: Use vector graphics to create a clean and modern look.

With these 15 website design ideas, you should have plenty of inspiration to create or revamp your own website design!

How to incorporate inspiration into your own website design

Incorporating inspiration into your website design is a crucial aspect of creating a visually appealing and engaging website. The first step to incorporating inspiration is to identify the specific elements that you want to incorporate, such as color schemes or font choices.

One way to do this is by examining other websites in your industry or niche for ideas. Take note of what works well on those sites and consider how you can adapt these elements to suit your own brand identity.

Another approach is to look at non-website sources of inspiration, such as art, nature, or fashion. These sources can provide unique ideas that will set your website apart from others in your industry.

Once you have identified the elements that inspire you, it’s essential to ensure that they work cohesively with the overall theme and purpose of your website. Don’t be afraid to experiment with different combinations until you find something that feels right for both you and your audience.

Remember also not just copying everything – put some twist on it! Make sure it has its uniqueness so people will still remember what company/brand are behind the site they visited.

By incorporating inspiration into your website design process, you can create a truly authentic online presence that resonates with visitors and leaves a lasting impression.

Conclusion

To sum up, finding inspiration for website design can sometimes feel like a daunting task. But with the right resources and mindset, it can actually be an exciting process that leads to innovative and impactful designs.

Remember to always keep your target audience in mind when exploring different ideas and inspirations. Think about what will appeal to them and best convey your brand’s message.

By using some of the techniques we’ve outlined here, such as browsing other websites, seeking out social media trends, or taking inspiration from nature or art, you’ll have no shortage of creative ideas to draw from.

Ultimately though, the key is to not get too caught up in trying to replicate something exactly – allow yourself the freedom to adapt and personalize any inspirational source you come across so that it aligns with your specific needs.

With these tips in mind, go forth boldly into your next website design project armed with all sorts of fresh new ideas!

Read More
Author DM June 1, 2023 0 Comments

How To Build a Website From Scratch (Step by Step Guide)

Building a website is “NOT AN OPTION”, it is a NECESSITY for any type of business or company, as it helps create brand awareness and an online presence in today’s digital environment.

A Step by Step Guide To Create A Website

Determine the goal & purpose of your website

Read More
Author DM June 1, 2023 0 Comments

What Is Graphic Design? 10 Amazing Tricks & Tips

What Is Graphic Design? 10 Amazing Tricks & Tips

Are you curious about the world of graphic design? Whether you’re an aspiring designer or a business owner in need of professional design services, understanding the basics of graphic design is essential. From logos to websites, packaging to advertising campaigns, graphic design plays a crucial role in shaping our visual culture. In this blog post, we’ll explore what graphic design is all about and provide 10 amazing tricks & tips for designers looking to up their game. So get ready to dive into the exciting world of graphic design!

What is Graphic Design?

Graphic design is a type of visual communication that combines art and technology to convey a message, idea or concept. It involves creating designs for various mediums such as print, digital media or even physical products like packaging. Graphic designers use typography, images, colors and other elements to create visually appealing designs that capture the audience’s attention.

One of the main goals of graphic design is to solve problems by creating effective visual solutions. Whether it’s designing a logo for a new business or developing an advertising campaign for an established brand, graphic designers are responsible for communicating complex ideas through simple yet impactful visuals.

There are different types of graphic design including branding and identity design, web design, user interface (UI) design and publication design among others. Each type requires specific skills and expertise from the designer.

Ultimately, good graphic design should not only look aesthetically pleasing but also serve its purpose by effectively communicating the intended message to the target audience.

The Different Types of Graphic Design

Graphic design is a vast field that covers various aspects of visual communication. Here are some of the different types of graphic design:

1. Branding: This involves creating an identity for a company or product through the use of logos, typography, color schemes and more.

2. Advertising: This type focuses on creating designs that promote products or services through print or digital ads.

3. Web Design: As the name suggests, it deals with designing websites and web pages to make them visually appealing as well as user-friendly.

4. Packaging Design: From food items to electronic gadgets, this type deals with designing packaging that catches the customer’s attention while also being functional.

5. Environmental Graphic Design: It involves designing graphics for physical spaces like museums, airports, hospitals etc., making them informative and aesthetically pleasing at the same time.

6. Publication Design: This type includes designing layouts for books, magazines and newspapers using images and typography in an engaging way.

7. Motion Graphics: Creating animated graphics to convey messages is what motion graphic designers do best!

Each category has its own unique set of skills required from designers who work within it but all require excellent communication skills along with creativity!

Pros and Cons of Graphic Design

Graphic design is an essential element in the business or marketing industry. It can help elevate a brand’s image and boost its engagement with potential customers. However, like any other field, graphic design has both advantages and disadvantages that must be considered.

One of the benefits of graphic design is its ability to communicate complex messages effectively. With well-designed graphics, businesses can convey their message clearly and concisely to their target audience. Additionally, good designs can create an emotional connection between brands and consumers.

On the downside, high-quality graphic designing requires training and expertise which may not be accessible for everyone. Also, it can be expensive to hire professional designers for small projects hence self-designing may become necessary which could lead to low quality work if one isn’t proficient enough.

Another disadvantage of graphic design is that it’s subjective; what looks great to one person may not appeal at all to another individual. This makes it challenging for designers as they have less control over how people will perceive their work or whether or not it will resonate with them.

Relying on designing tools alone without any idea about creativity might result in visually appalling designs that do more harm than good by creating a negative impact on a brand’s reputation,

While there are some drawbacks associated with graphic design such as accessibility issues among others mentioned above but when done correctly -it’s undoubtedly an effective tool for building strong branding identities!

What are the Best Graphic Design Software?

When it comes to graphic design, having the right software can make all the difference. There are many options on the market, each with their own unique features and capabilities. Here are some of the best graphic design software available today.

Adobe Photoshop is a staple in the industry and is known for its powerful photo editing tools. It allows designers to manipulate images with precision, adjust colors, add special effects and create custom graphics.

Illustrator by Adobe is another popular choice among designers who need to create vector graphics like logos or icons. Its user-friendly interface makes it easy for beginners while also offering advanced features for experienced users.

CorelDRAW offers professional-grade illustration and layout tools that allow designers to produce high-quality designs quickly and efficiently. With an extensive library of built-in templates, CorelDRAW simplifies complex projects while still allowing creative freedom.

Affinity Designer provides a cost-effective alternative to Adobe’s suite of programs without sacrificing quality or functionality. Its intuitive interface includes advanced vector drawing tools, pixel-perfect controls and support for multiple file formats.

Ultimately, choosing the right software depends on your specific needs as a designer. Take into account your budget, level of experience and desired outcome before making a decision on which program will work best for you.

How to Choose the Right Graphic Designer for Your Project

Choosing the right graphic designer for your project can be a daunting task, especially if you are not familiar with the world of design. Here are some tips to help you make an informed decision.

Firstly, it is important to review the designer’s portfolio and experience. Look for their previous work and ensure that they have worked on projects similar to yours.

Secondly, consider their communication skills. A good designer should be able to clearly communicate their ideas and listen attentively to your needs and preferences.

Thirdly, check for references from other clients or professionals in the industry. This will give you an idea of their working style and reputation.

Fourthly, take into account their pricing structure. While it may be tempting to opt for a cheaper option, remember that quality comes at a price.

Trust your instincts. If something doesn’t feel right or if you don’t feel comfortable communicating with the designer during the initial stages of discussion, then perhaps they may not be the best fit for your project.

Choosing a graphic designer requires careful consideration of various factors such as experience level, communication skills, reputation among peers and clients as well as pricing structure. Keep these factors in mind while making your decision so that you can find someone who can bring out the best in your project!

10 Amazing Tricks & Tips for Graphic Designers

As a graphic designer, you’re always looking for ways to improve your skills and create more effective designs. Here are 10 tricks and tips that can help take your graphic design game to the next level.

1. Use White Space Effectively
White space is one of the most important elements in graphic design. Leaving areas without text or images helps give your designs a clean and uncluttered look.

2. Understand Color Theory
Color plays a huge role in how people perceive your designs. Understanding color theory can help you choose colors that complement each other and evoke certain emotions.

3. Keep It Simple
Sometimes less is more when it comes to graphic design. A simple design with clear messaging can be much more effective than something overly complicated.

4. Experiment with Typography
Typography is another key element of graphic design. Play around with different fonts, sizes, and styles until you find the perfect combination for your project.

5. Know Your Audience
Your audience should always be at the forefront of your mind when creating a design. Consider their preferences, needs, and demographics as you work on your project.

6. Stay Up-to-Date on Design Trends
Design trends are constantly evolving – staying up-to-date ensures that your work stays fresh and relevant.

7 . Pay Attention to Hierarchy
Hierarchy refers to the visual organization of information within a layout or composition; it’s essential in making sure viewers see what they need to see first .

8 . Utilize Contrast
Contrast helps make elements stand out from one another , ensuring clarity throughout any given piece

9 . Be Consistent
Consistency makes all parts of a piece feel cohesive; this means using consistent typography , spacing , colour palette etc

10 . Practice Makes Perfect
Graphic Design requires practice just like any other skill so keep experimenting even if it doesn’t go well initially – every mistake will only lead towards improvement!

Conclusion

To wrap it up, graphic design is an essential aspect of marketing and branding for any business. It involves creating visual content that communicates a message to the target audience effectively. The different types of graphic design include web design, advertising, packaging, and more.

While there are pros and cons to using graphic design in your business strategy, the benefits outweigh any potential drawbacks. The right software can make all the difference when it comes to creating stunning designs that stand out from competitors.

When choosing a graphic designer for your project, consider their experience level, portfolio quality, and communication skills. And lastly, keep these 10 amazing tricks & tips in mind as you work on your next project:

1. Keep it simple
2. Use contrast
3. Pay attention to typography
4. Create a mood board
5. Understand color theory
6. Follow current trends (but don’t rely on them)
7. Don’t be afraid of negative space
8. Utilize grids and alignment tools
9. Get feedback from others
10.

Be open-minded

By following these best practices in combination with effective communication between client and designer throughout the process will lead you closer to achieving your desired outcome.

Incorporating eye-catching graphics into marketing materials often leads to better engagement rates among consumers or clients than written copy alone does- this means investing in high-quality graphic designing services should be considered an important investment by every business owner who wants their brand image standing out against competition!

Read More
Author DM June 1, 2023 0 Comments

Website Template: Choosing the Best (An Informative Guide)

A website template is a pre-made web page where the user can customize the content and elements according to its requirements to get a high-quality professional website.

These templates work as a base/starting point for building your website, which helps people with no coding knowledge/experience skip creating webpages from scratch.

While designing the template using a programming language such as HTML, CSS, JavaScript, jQuery, PHP, and many more, the developer keeps in mind the general audience.

The same templates can be used multiple times by different people and companies.

Here Is A List Of Elements That Comprise A Website Template

Common Elements :

  • Site Logo, Name/Title, Background Colour
  • Global Fonts, Colours, Buttons
  • Header
  • Navigation Bar/Menu
  • Layout with pre-made content blocks
  • Templates would be either responsive or adaptive, which includes a mobile version
  • Picture Gallery, Slideshow
  • Banner or Video Background
  • Video Player
  • Contact Form
  • Chatbot
  • Animations
  • Social Media Icons
  • Footer
  • Integrations with third-party plugin
  • Secure Integrated Payment System

According to the person and company goals & requirements, some elements may differ, such as:

  • Blogs
  • Online Store – product catalogs, “buy, shop now, add to cart, buy now, shop” button, cart icon, checkout page.
  • Online Donation
  • Take the online booking for services, events, conferences, shows, courses, classes, hotel rooms, and many more.
  • Restaurant/Cafe/Bar/Bakery – Menu Catalog, Book reservation for table online, Order Online.
  • It should have a music player to listen to the music uploaded
    you can also sell the music as an individual or as an album.

and many more in a website template.

The website template can be a single page or multi-page, where each page has its elements & features, styled according to the type of website, industry, business, and also based on topics. It can be a free or paid version.

You can find it as a stand-alone downloadable/purchasable from a third-party marketplace or included with CMS or a website builder.

Guidelines To Consider On How To Choose The Best Template

The website represents a brand and is also an integral part of the company or person.

The style, look, feel & tone in which you interact with users will decide whether they want to stay and engage with the site.

Looking at so many templates can leave you feeling lost or confused about which one is best for your website.


Therefore, here are some key points to research about the website template before making any decision:

  • Reviewing user ratings and testimonials
  • Developer’s Bio – Experience, list of templates created so far.
  • How is the customer support – reading reviews, study support forum, how quickly do you receive technical support from the developer?
  • Is the template up-to-date and compatible with the current version of CMS or website builder, and browser?
  • Does the template update frequently?
  • How easily are the template vulnerabilities, bugs, and issues being resolved?
  • How secure is the template from cyber attackers?
  • Log all the updates till the current version of the template
  • Have in-depth documentation & tutorials (blogs, guides, video) about how to use the template, including (features & functionality)

What type of website are you building?

You should be clear of

What do you want from the website? Do you want Brand awareness, Increase Traffic, Grow Customer Base, Increase Conversion, Increase Sales, and Reduce Cart Abonnement?

Who is your target audience?

In what ways can you solve the problems & pain points of the visitor? How will they benefit from it?

Do you want the audience to take any action once visiting the website – download, purchase fill out a form, or book online?


Deciding the purpose of the website, whether it will be:

Online Store

Blog

Business Service

Portfolio

Entertainment

News / Magazine

Events

Online Food Order

Online Booking

Community

Education

depends on what business you do, in which industry you are, & for what topic.

According to these points, you also have to decide what features & functionality would be available on the website.

Customization

Read More
Author DM June 1, 2023 0 Comments

Instagram story download

Instagram story download


Introduction

Are you an avid Instagram user who loves to keep track of your favorite accounts’ stories? Have you ever come across a story that you wish to save and cherish forever? Luckily, there is a way! In this blog post, we will discuss how to download an Instagram story. Whether it’s for personal keepsake or marketing purposes, knowing how to download a story can be incredibly useful. So sit back and read on as we uncover the steps needed to get your hands on those precious Insta-stories.

What is an Instagram Story?

Instagram Stories are a popular feature of the Instagram platform. They allow users to share photos and videos with their followers that disappear after 24 hours. These stories appear at the top of your feed, making it easy for viewers to see and engage with them.

What sets Instagram Stories apart from regular posts is their ephemeral nature. Unlike permanent posts, which remain on your profile indefinitely, stories only last for a short time before disappearing. This makes them perfect for sharing spontaneous moments or behind-the-scenes glimpses into your life or business.

Another unique aspect of Instagram Stories is the ability to add fun filters, stickers, music, and other interactive elements to enhance your content. This has made stories an incredibly engaging format that drives high levels of user engagement.

Instagram Stories are a great way to stay connected with your audience in real-time while also showcasing your creativity and personality in fun and interesting ways.

How to Download an Instagram Story

Downloading an Instagram Story is a great way to save and share interesting content that you come across on the platform. Here’s how you can download any Instagram story quickly and easily.

Firstly, open up your Instagram app and navigate to the story that you wish to download. Once there, click on the three dots located in the top right-hand corner of the screen. From here, select “Save” or “Download” depending on which option appears for you.

If neither of these options appear for you, don’t worry! You can always use third-party apps such as “StorySaver” or “StoryDownloader” to help facilitate this process. Simply search for one of these apps in your phone’s app store and follow their instructions.

Once downloaded, make sure to give credit where it’s due if sharing someone else’s content – it’s important to respect intellectual property rights on social media!

Downloading an Instagram Story is a simple process that can be done in just a few clicks or with some assistance from third-party apps.

Pros and Cons of Downloading an Instagram Story

Downloading an Instagram story has its own set of advantages and disadvantages. On one hand, it can be a useful tool for businesses to analyze their competitors’ content or keep track of their own stories. However, there are also some concerns that come with downloading Instagram stories.

One of the biggest advantages is that you can save your favorite moments from other users’ stories and re-watch them whenever you want. This feature can be especially helpful for those who want to learn more about Instagram marketing services or social media strategies used by others in their industry.

Another pro is that by analyzing your competition’s stories, you can gain valuable insights into what works and what doesn’t work in terms of engagement and reach. You could use this information to improve your own strategy or even create new ideas based on what’s popular among your target audience.

On the flip side, downloading someone else’s story without permission may not always be ethical. It may even violate copyright laws if the content is copyrighted material.

Moreover, it could also lead to privacy concerns as people may feel uncomfortable knowing that their personal content has been saved by someone else without consent.

While there are benefits to downloading Instagram stories for marketing purposes, it’s important to weigh these against any potential ethical concerns or legal issues before doing so.

Conclusion

Downloading an Instagram Story can be a useful tool for social media marketers and individuals alike. Whether you want to save a memorable moment or use the content for your own marketing purposes, knowing how to download stories is a valuable skill.

However, it’s important to remember the potential ethical concerns that come with downloading someone else’s content without their permission. Always make sure you have the right to download and use the content before doing so.

Using Instagram Stories as part of your social media strategy can be incredibly effective in reaching your target audience and promoting engagement. And by knowing how to download them properly, you can take full advantage of this dynamic feature. If you are looking for more advanced strategies on Instagram marketing services then consulting SEO experts may help you achieve better results.

Read More
GoTitNow.in May 10, 2023 0 Comments

New to Google Site? Here’s Everything You Need to Know!

Google Site (part of Google Workspace) is a free and easy-to-use website builder and page creation tool, also known as Google Website Builder.

Therefore, it helps small businesses or people with zero coding knowledge to build a simple website or a single page, such as:

  • You can showcase your work using a portfolio.
  • Resume / CV
  • Landing Page
  • Schools/colleges can use it to provide information about courses, activities, assignments, staff, rules, etc.
  • Events information with direction to it
  • Wiki – info about your brand or company
  • Help Center – FAQs, community, guides, raising issues/feedback, etc.
  • Build an intranet site (Project Hubs, Team), which helps with internal communication.

You’ll need to have a Google Account to access Google Site. It is free to use.

But there’s a catch here, as there is some additional cost that comes outside of the Google Site, such as:

  • If you exceed the storage that comes with the free Google Account, then you have to pay for extra storage.
  • Register a custom domain with Google or purchase it from a third-party site or Google Domain.
  • Having a Google workspace Account with either an enterprise plan or a business plan

Google Site – Important Fact

According to the updates:

Starting in May 2021, people going to the Google Site are automatically taken to the New Interface to create a new website/page.

Starting in December 2022, for people using Classic sites, the editing function for all remaining sites/pages will be disabled.

Also, ensure a smooth transition of converting all the Classic Site to the New Site using the Classic Site Manager or by going to Classic Google Site – Setting – Manage Site – Convert to new site.

Starting in January 2023, any left-out sites/pages are automatically downloaded as an HTML file & saved to the owner’s Google Drive with a replaced draft on the New Site for the owner to review & publish.

Features Of Google Website Builder

  1. Hosting Included
  2. The website or page created is automatically saved to Google Drive.
  3. All the templates are responsive
  4. Templates (choose from the gallery, create your own and submit), Themes (choose from limited options, create your own, Import)
  5. Simple, easy-to-use drag & drop builder tool
  6. Autosave your work or any changes in real-time
  7. Header Title, Image
  8. Footer
  9. Site Name, Logo, Favicon
  10.  Page – Add, Delete, Organize, Nest Page – Subpage
  11.  Content Blocks (Section Layout)
  12.  Navigation
  13.  Table of Contents
  14.  Spacer
  15.  Spacing in between content with Density Theme
  16.  Embed – URL/Code (Full Webpage, Html, JavaScript, CSS)
  17.  Announcement Banner
  18.  Images
  19.  YouTube
  20.  In-built Search (Google Image, YouTube, Map) directly from the Interface
  21.  Text Box
  22.  Image Carousel
  23.  Collapsible Group
  24.  Divider
  25.  Button
  26.  Placeholder
  27.  Integrating with Other Google Products – Drive, Docs, Maps, Forms, Calendar, Sheets, Slides, Maps, and many more – use the content associated with these
  28.  Add a social media link
  29.  You/the editor can now review the changes made before publishing the site.
  30.  Collaborate and Co-edit with other people in real-time.
  31.  You can create five custom URLs for a site with a purchased domain
  32.  Version History
  33.  Show Page Last Updated Time
  34.  Basic Data from site – track & measure performance – using Google Analytics

How To Build A Website Using Google Website Builder

There are many ways to go to Google Sites

Paste the URL https://sites.google.com or https://sites.google.com/new in the search box or address bar.

When using the Chrome browser, it automatically opens the Google Page. In the Firefox or Edge Browser, you type https://www.google.com in the search box or address box.

OR

When using Gmail, Drive, or any other Google Product, you can go to Sites.

BY

Click on the square box with nine dots at the right-hand corner, scroll down, and then click on More from Google. Scroll down until you see “Sites” under the Google Products heading. Click on it.
A pop-up will appear asking you to sign into your Google account if you are not logged in.


Site Home

In the New Site Interface, you can choose a template from the Template gallery or opt for a Blank Template to create from scratch.

When you click the Template gallery, it divides under different heading such as personal, work, small business, and education.

All the websites/pages you have built till now will come under Recent Sites.


Naming a Site

After the template is selected, at the top-left corner beside the Google Sites Icon, you can give a Site Name that you can use to save on Google Drive.

At the top-left corner of your page, you can give a Site Name that can be useful for publishing. You can leave it blank and add a Logo instead.


Note: Images will be in the following formats: PNG, JPG, or GIF.

Site Logo

For the Logo of the site, hover over to the top-left corner of your page, click Add Logo or In Settings which is at the top right corner, and click the Gear Icon – Brand Images – Under Logo – Upload/Select.

You can also add an Alt Text to it.


Favicon

You can also add a Favicon for your site – In Settings which is at the top corner, click Gear Icon – Brand Images – Under Favicon – Upload/Select.


Announcement Banner

To make an important announcement, offer discounts. You can add an announcement banner on the site.

Go to Settings, which is at the top right corner, and click the Gear Icon – Announcement Banner – enable Show Banner – Banner Color – Under Announcement (Message, Button label, Link, Open in new tab) – Visibility (Home page only/All Pages).


Note: The header and footer will appear on each page of your site, including the homepage.

Header

In the Premade Header, give a Page Title and choose your Header Type from the following: Title Only, Cover, Banner, or Large Banner with an image – click on Change image – Upload/Select Image, which is at the bottom-left corner.

Hover over the image at the bottom-right corner. The three-star icon is for readability adjustment (makes it easier for the Text to read), and the anchor icon is for placing the image in the following direction: center, top, bottom, right, left, bottom right, bottom left, top right, and top left.

If you have deleted the header, to re-add it, hover over to the top of your page, and click Add header.


Footer

Go to the bottom of the page, click on Add footer/Edit Footer and start adding your content.

If you want to hide the footer on the page, hover over it, and at the bottom left corner, click the eye 👁 icon.

Collaborate & Co-edit with other people on your site

If you are working in a group or want to collaborate with others, at the top-right corner, click the person icon.

Type in the person’s name or email address and set the privileges (Editor/Published Viewer).

If you want to notify the person, Click on Notify People and add a message – click Send.

You can also choose if you want your site to be public, to a single person, or a bunch of people.

Under General Access:

Draft (Restricted, Anyone with the link)

Published site (Restricted, Public, company/school account, Remove Link)

Then click Done.

Click on the gear icon at the top and uncheck Editors can publish, change permissions, and add new people, if you only want to give edit permissions.


Preview your site

Click on the preview icon to see how your site will look on a computer screen , a tablet , or a mobile.

At the bottom-right corner, click the cross × icon to exit the preview mode.


Delete & Recover Your Site

If you want to delete your site, click on Google Sites Icon, which will take you to Site Home – Under Recent Sites, choose the site, and click on the three dots – Remove – MOVE TO TRASH

The site is now in Google Drive Trash Folder. To delete it permanently, go to Google Drive – on the left, click Trash – 2 ways to delete your site

  1. At the top, click Empty Trash – click Delete Forever – which will delete all the files in the trash folder.
  2. Select your site, then click the trash 🗑 icon at the top – click Delete Forever – which will only delete the file you have selected.

To restore the deleted site – Select your site, then click the Restore icon – which will restore the file to its original location.


Duplicate your site

Open the particular site you want to duplicate from Site Home under Recent Sites, then click on the three dots , which is at the top-right corner – Make a copy – Enter a file name for the duplicate site – optional (To change the folder in which the site will save, click Change – click Share with the same editor) –

If you want to copy the whole site, click on Entire site – click OK.

If you want to copy a few pages or even one page from the existing site, click Selected page(s) – Next – Expand the section & choose the pages you want to copy – optional (Delete pages after copying) – Ok

Check your email for updates.

Each of the site pages divides into sections. To customize it, hover over the section and click the icon: (Duplicate Section), 🗑 (Delete Section), or 🎨 (Section Color), which is on the left side.


On the right side, you have a sidebar that comprises 3 Tabs – Insert, Pages, Themes

Insert

To add content to your site, click on the Insert Tab.

Click on the elements to add them to your webpage.

You can also resize or change the place of the elements on the webpage.


Textbox

When you click on a textbox on top of it, you will see the formatting options such as text styles, font style & size, alignments, list, and many more options.

You can also add links to your text box – click the Insert Link icon – Add Text – Add Link (URL/Pages) – click Apply

To enable anchor links – Go to Settings, which is at the top right corner, and click the Gear Icon – Viewer tools – Enable Show anchor links


Collapsible Group

Click Collapsible Group – add your heading & body text


Table of contents

Click table of contents – all your titles, headings & subheadings will be included in this so that you can navigate your webpage better

To hide a heading, hover over it – click the eye 👁 icon


Button

Click Button – Add Name – Add Link (URL/Pages) – Insert

On top of it, you can decide which style of button.


Social Link

Click Social link – Add image – Add Link (URL) – click Insert

On top of it, you can decide icon size, shape, style, color, align.


Note: Images will be in the following formats: PNG, JPG, or GIF.

Images

Click Images – Upload/Select

On top of it, you have options such as crop, add alt text, add caption, replace images, insert link, etc.


Note:  A carousel must have at least two images.

Image Carousel

Click Image carousel – plus sign – Upload/Select – Click Insert

At the top-right corner, click the gear icon – enable Show dots – Show captions – Auto Start (select Transition speed) – click insert. If you want to go back, Click ←.


Note: When you enter a link to another website, the website owner may refuse to allow others to add their content to your site. For that, you have to contact the owner.

Embed Content

Here the embedded content comes as a part (section) of the page.

Click Embed – Add URL: (Whole Page, Preview)/Embed Code (Paste the code) – Insert


Integrating with Other Google Products

Forms – 2 options

You can embed a form.

               OR

Create a form in Google Forms.

Come to your site and click Forms – Select the form which you want on the page


Create a document in Charts, Docs, Slides, and Sheets accordingly.

Come to your site and click Docs – Select the doc that you want on the page, Charts – Select the Chart which you want on the page, Slides – Select the Slide which you want on the page, Sheets – Select the Sheet which you want on the page


To add a File from Drive, you first have to upload it to Google Drive.

Come to your site and click Drive – Select the file which you want on the page


Click YouTube – Video Search/Uploaded


Click Calendar – select the calendar you want to show on the page – Insert

At the top, click on the gear icon – calendar setting (Show Title, Date, Time zone, Navigation Button, Use Viewer’s Time zone, View Selection, View Mode)


Click Map – Enter Location – Select

Themes

If you want to change the style & look of the site, click on the Themes tab.

Under the Created by Google heading, select from a limited range of pre-made themes.


Under Custom Heading:

Create a Custom Theme

Click the plus + sign, add a Theme Name with an optional logo & banner image – Click Next – Select Colors from Preset colors Tab or choose your colors for the different sections of your site from the Custom colors Tab – Click Next – Select fonts, and click Create Theme.

You can continue to make changes to your new custom theme in the sidebar on the right side.

Custom Theme offers additional elements to customize, such as

  • Colors: The standard color. For each section, you can select the style with background & text color.
  • Text: Set the font, size, format, align, line & paragraph spacing according to the text style selected.
  • Image: Header, Logo, Favicon
  • Navigation: Background, Selected Page
  • Components: Select the style and change the color of the components – button, divider, link, and image carousel.
  • Spacing: Set the space between the contents on the site.

Go to the custom theme you want to duplicate or remove and click on the three dots – Duplicate theme/Remove.


Import a Custom Theme 

For importing a custom theme from one Google Site to another, click the upload sign, choose the site – click Select – choose the theme (A site can have multiple) – click Import Theme.

Pages

Click on the Pages Tab to add a new page or subpage and organize the pages.

Bottom of the tab, hover over the plus sign, which shows options such as New page , New link , Full page embed , and New menu section .


Add a new page

Click on New page – Add Name – click Advanced – optional (Custom Path) – Done.


Add a Link on the Navigation bar

Add a custom link, such as the company’s social media profile, tool/software, team’s drive folder, project tracker, or another website, to directly show in the navigation.

Click on New link – Add Name – Add URL/Pages – open in new tab – Done.


Note: When you enter a link to another website, the website owner may refuse to allow others to add their content to your site. For that, you have to contact the owner.

Add embed content as a Full Page

You can embed content as a new page instead of having it as a part of the page.

To do that, click on Full page embed – Add Name – click Advanced – optional (Custom Path) – Done.

To embed the content, either click on Add embed – Add URL: (Whole Page, Preview)/Embed Code (Paste the code) – Insert, Add From Drive, or Embed the file, video, or map and many other options from the Insert Tab.

The content will fill the entire page.


Add New Menu on the Navigation Bar

It allows you to create a non-clickable drop-down menu that works like a folder that groups pages and links.

To do that, click on the New menu section – Add Name – Done.

To add existing pages and links, click & drag the page or link and drop it into the new menu.


Duplicate Page

Click on the page you want to duplicate, then go to the three dots and click Duplicate page – Add Name – click Advanced – optional (Custom Path) – Done.

Now you can make the changes to the contents while keeping the same layout, theme & format.


Delete Page

Click on the page you want to delete, then go to the three dots and click Delete. By viewing the version history, you can restore the page.


Hide Page

Click on the page you want to hide, then go to the three dots and click Hide from navigation.


Rearrange Pages

To rearrange the pages, click & drag the page around until you find in which order you want them to appear in the navigation and then drop it.


Note: Up to 5 levels of subpages you can create.

Add subpages – Nesting of Pages

There are two ways:

  • Click on the page where you want to have the subpage, then go to the three dots and click Add subpage – Add Name – click Advanced – optional (Custom Path) – Done.
  • Click & drag the existing page and drop it over the top of the page that becomes the parent page.

If you don’t want to make an existing page a subpage, drag it outside the parent page & drop it


Set as Homepage

Click on the page you want as a homepage for your site, then go to the three dots and click Make homepage.

Navigation

By default, it uses the top navigation bar. You can change the layout of the navigation bar by going into Settings, which is at the top right corner, and clicking the Gear Icon – Navigation – Mode (Top/Side – if you have lots of pages on your site) – Color (Transparent, White, Black).


Site Info

If you want to show info about the site, go to Settings, which is at the top right corner, and click the Gear Icon – Viewer tools – Under Info icon – enable Show page last time updated.

The icon is at the lower left side of the site – click on it to see the info.


Publish your site

When you have completed building your site and are ready to make your site accessible to the world. Click on the Publish button, which is at the top-right corner.

It is for you to decide whether you want to go with the

Default URL – https://sites.google.com/view/Webaddress

Enter the web address name that you want the site to be published

OR

Add Custom Domain:

Note: Only the owner of the site can connect a domain. You can add up to 5 custom domains to a site.

Under Custom Domain Heading, Click Manage or go to Settings, which is at the top right corner, and click the Gear Icon – Custom domains – Start setup – three ways

Click Buy a domain if you haven’t purchased one.

                                  OR

Click Use a domain from a third party.

                                  OR

Click Select a domain from Google Domains – This option will show if you have purchased from it.

And then click Next

Then follow the on-screen instructions to connect to the domain.


Under who can view my site Heading, click Manage.

Click Publish.


Now that the site is live, you will see a down arrow next to the Publish button that shows options such as Publish settings, Review changes & publish, View published site, and Unpublish.

Click on the down arrow next to the Publish button, click Publish Settings, under the Heading Review changes and publish, optional (uncheck Editors must review changes before publishing) and Click Save.

If you have made some changes to the site, then when you hit the Publish Button again, there will be a split screen with the draft on the left & Currently Published on the right.

To go to the Draft site, go to the top-left corner and click .

Click the Publish button at the top-right corner when you are ready to publish the draft.


Version History

As you build your site, you will make many changes as time passes. If you want to see and revert to some changes, click the three dots that are in the top-right corner – Version History, or at the top of the page, click on All changes saved in Drive.

At the right-hand side, choose from the version by previewing which one to review – you have two options (Restore this site version, Restore this page version) at the top-left corner.

Note: To go to the current version, go to the top-left corner and click .

Read More

Corporate Logo

Read More
Author DM October 28, 2022 0 Comments
Web Programming Development Composition

Who is a web developer? A Brief Explanation

The role of a web developer is to take the web design created by the client or designer and convert them into a fully functional, user friendly website or app that runs on the internet or corporate intranet and also aligns with the client’s goals & requirements.

The main task of a web developer is to create, maintain, update, and troubleshoot any problems related to the core structure of a website.

They can work as freelancers, web consultants, or with a company. It can range from static web pages and simple apps to complex websites and applications like eCommerce, booking, social media, etc.

3 Type of Web Developer : a brief detail

  1. Front-End Developer

    Also known as Client Side, is responsible for the visual representation that determines what the clients or people will see when they visit the website.

    They ensure easy interaction with the site through buttons, images, links, menus, or even text. Optimizing the website to be responsive.

    Skills: JavaScript – jQuery, Framework: (React, Angular), HTML, CSS Framework: (Bootstrap, Foundation), Version Control: (Git), Web performance, SEO, Test & Debug.

  2. Back-End Developer

    Also known as Server Side, is responsible for focusing on website architecture, server, back-end logic, APIs, and writing clean codes that help communicate information from the database into the browser, while keeping data integrity & security protocols in mind.

    They say that back-end developer is the backbone of the website. Without them, a fully-functional website or app is impossible.

    Skills: Java, Python, Ruby, C#, PHP, Database: (MySQL, Oracle Database, Mongo Db, Microsoft MySQL Server), Knowledge of APIs: – (JSON, SOAP, REST), Version Control: (GitHub, Git), Server: (Apache, AWS – Amazon Web Services, Azure, Google Cloud Platform), Test & Debug.

  3. Full Stack Developer

    is a hybrid model where the web developer works, on the front end & back end of the website or app.

    They must have a strong understanding of the programming language, know how to manage databases and APIs, and operate in a secure environment to become a Full Stack Developer.

What are the responsibilities of a developer?

  • Write clean, reusable codes for both the front and back end, so they can be used in the future
  • The web developer must stay up-to-date with technology/industry trends, new programming languages, tools, etc.
  • The web developer’s job is to check whether to update or modify the existing website of the client.
  • Taking a backup of all the files, database, and local directory is important in case of emergency
  • Collaborate with other team members or clients throughout the project.
  • Create a cross-platform app that works on Smart TVs, mobile, tablets, and even desktop
  • Sometimes clients ask the web developers to design and write content for the websites they have built & maintained.
  • Troubleshooting website issues, problems, and bugs through testing & customer feedback to ensure the web pages have super-fast loading speed, and smooth running of the website on all browsers & devices (mobiles, tabs, desktops)
  • Optimizing the site’s performance & monitoring the site’s traffic to ensure scalability
  • Maintain & update the site periodically for the best user experience
  • Converting text, image, audio, and video elements into a compatible web friendly format.

Here is a list of Soft Skills that every developer must endure

  • Good Communication
  • Teamwork
  • Leadership
  • Patience
  • Constantly learning & keeping yourself updated with the industry
  • Time Management
  • Be attentive to the detailing of the website or app
  • Open-Mindedness
  • Be Creative
  • Logical Reasoning & Critical Thinking
  • Analytical Skills
  • Problem Solving
  • Accountability

9 reasons why a business needs web development

  1. Helps protect the company’s brand identity by maintaining ownership of the domain name, which avoids surrendering control of the brand to the third-party website and its ads.
  2. Increase accessibility of your business, and ensure your business expands globally – reaches out to a broader audience, and access to a new market.
  3. Provides online presence 24/7, where visitors can access or purchase the products/services – anytime (even outside business hours), anywhere.
  4. Creating easy navigation for the website by adding a menu, header, footer & search box for easy access to information.
  5. Create & maintain consistency among the pages of the website by using the same structured layout, design, font, color, logo, style, and brand name. These elements help visitors associate with the brand recognition,
  6. Optimize the website using the SEO technique – image optimization, keywords, titles, meta description, links to other related blogs, and much more, which helps attract organic traffic and ensures a high rank on the search engine result page (SERP).
  7. Good and organized content helps deliver the right message to the visitor with original, relevant & real-time information.
  8. Improve visitor experience on the website by quickly resolving their questions related to the company by building a dedicated support page, a list of FAQs, contact form, incorporating chat & live support.
  9. Analyzing the customer behavior, user engagement, conversion rates, bounce rate, and many more parameters to help keep the website running successfully.

Salary Of Web Developer

As per the PayScale Website: Update on May 2022

The average salary of a web developer in India is ₹320,759/year

Web developer (<1yr experience) – average salary in India is ₹247,908/year

Web developer (1-4yr experience) – average salary in India is ₹310,525/year

 List of factors considered when determining salary:

  • Company – Startup, Small-Sized Company, MNCs, etc.
  • Experience – Freshers, Junior, Senior, Manager, CEO, CTO, CFO, etc.
  • Location – urban areas: IT hub (Mumbai, Bangalore, Delhi, Pune, etc.) or rural areas
  • Skills – Knowing different technical skills is great. Apart from technical skills, soft skills and managerial aspects are also discussed when deciding on the salary.
  • Education – Diploma/Certifications, Graduate, Post-Graduate, PhD

Read More
Author DM May 28, 2022 0 Comments

Wix : The Most Popular & Flexible Website Builder

Wix is one of the most popular freemium website builders on the market, offering both free and paid plans.

It is ideal for beginners, freelancers, and small-sized businesses who want to build and design a fully personalized, high-quality website in a short time.

Wix is not only a website builder, but also has a built-in all-in-one online business solution that will manage and grow your business online.

It also offers free, reliable, protected, scalable, and secure web hosting with built-in SSL Certificates.

Website Templates

Why do these companies or individuals want a website? So that they can build their online presence in the market for either personal or commercial purposes.

Just publishing your website on the internet is not enough, it’s about the first impression of your business or you that the audience will make while going through the website.

The primary step is the most difficult part. Choosing the right type of website that aligns with the goals, objectives, and what the business wants to achieve from its digital presence can be one of the most difficult parts of web development.

Choose from over 800+ customizable and eye-catching templates, which will give you the freedom to design and create your website the way you want.

It uses the “What you see is what you get” pattern on all templates.

Wix Website Templates

If you have a detailed concept that none of Wix’s existing templates matches, you can choose a blank template and let your imagination run wild by choosing all the elements, styles, and details yourself.

This method may be too time-consuming for multi-paged and content-rich websites, as you need to design each page separately.

Individuals and small-sized companies should be careful when selecting a template, as when the website goes live, the templates are not interchangeable.

If you choose another template, you have to take down the existing website and start from scratch.

Drag & Drop Editor

One of the strongest USP (Unique Selling Points) for Wix is the world’s most innovative drag and drop editor, also known as Standard DIY Editor.

After selecting the right type of template for your business, decide whether you want a Single-Page Layout or a Multiple-Page Layout website.

According to that, you can easily add or delete pages in the editor.

Display your images, videos, and text in a beautiful layout, and make them come to life with amazing animation, video background, and scroll effects.

To make your website even more interactive and useful, you can add customizable social media icons, contact forms, a live chat button, Google Maps, testimonials, reviews, and many other elements.

Add third-party apps or plugins from the App market to make your website more functional & user-friendly.

Use the Mobile Editor to have an optimized mobile-friendly website.

Add these advanced features to help grow & manage your business online.
  • Wix eCommerce – Display & Sell products, integrated a secure payment system with offers, track orders & manage inventory.
  • Wix Booking – Allow booking for services like classes, courses, and appointments, host an online session with Zoom, integrate a secure payment system, send email reminders to clients, and sync booking to Google Calendar automatically.
  • Wix Blog – Create a blog, manage engagement with the audience, schedule posts on the website & on the social media platform. Collaborate with writers & editors to help grow your blog by managing the content.
  • Wix Music – Provides a customizable player to showcase the albums, songs, and playlists. People can listen, share, and buy music directly from the site.
  • Wix Photography – Protect your images with a built-in password protector & watermark tool, and showcase your images and videos in over 30+ galleries.
  • Wix Video – Create a customizable video for the brand, upload video from anywhere – desktop, YouTube, Facebook, Vimeo. Sell, rent or offer plans accordingly on a weekly, monthly, or yearly basis to the channels
  • Wix Restaurant – Create a customizable menu with images, prices & labels for the restaurant; accept delivery or pick up orders online with a secure payment gateway or via phone. Book a reservation through the website.
  • Wix Events – Helps the brand create customizable online or in-person events. Sell tickets directly through the site using a secure payment gateway, or collect RSVPs. Track & Manage RSVPs with automated emails, editable guest & waitlist, and many more.
  • Wix Logo Maker – Design your custom logo, business card, and merchandise to build the brand online.
Use these built-in tools & features to promote the business online.
  • Get a professional email address that matches your domain & brand, along with the essential Google workspace tool.
  • Design social media posts, email marketing campaigns, landing pages, and advertisements (Google, Facebook, and Instagram). Use client management tools to help generate leads and drive conversion directly from the website.
  • Create inclusive public and member-only pages.
  • Get a tailored report about how your website is performing with Wix Analytics
  • For search engine optimization (SEO), get a step-by-step SEO plan for beginners, get your website indexed on Google, change the URL, meta tags, social sharing, alt tags, etc. Maintain an XML Sitemap, create 404 and 301 redirects, and integrate Google Business Profile, Search Console, and Analytics, among other things.

Wix offers a wide range of templates for different types of sites, according to the industry

Business & Services

Business

Consulting & Coaching

Service & Maintenance

Advertising & Marketing

Technology & Apps

Real Estate

Finance & Law

Automotive & Cars

Farming & Gardening

Pets & Animals

Health & Wellness

Health

Wellness

Sport & Fitness

Beauty & Hair

Makeup & Cosmetics

Hair

Fashion & Style

Fashion

Accessories

Travel & Tourisim

Hotel & B&Bs

Apartments & Hotels

Travel Service

Restaurants & Food

Catering & Chef

Restaurant

Cafe & Bakery

Bar & Club

Food & Drinks

Landing Pages

Coming Soon

Promotional Page

Professional CV

Creative

Photography

Events & Portraits

Commercial & Editorial

Travel & Documentary

Design

Architecture

Art & Illustration

Branding

Fashion Design

Graphic & Web

Music

Singer & Musician

Band

DJ & Producer

Music Industry

Music Promotion

Creative Arts

Performing Arts

Literary Arts

Visual Arts

Portfolio & CV

Portfolios

Resumes & CVs

Personal

Video

Film & TV

Online Education

Vlog

Community

Education

Schools & Universities

Online Education

Classes & Courses

Communities

Religion

Non-Profit

Online Forum

Events

Weddings

Holidays & Celebrations

Conferences & Meetups

Event Production

Venues

Store

Fashion & Clothing

Jewelries & Accessories

Arts & Crafts

Home & Decor

Beauty & Wellness

Food & Drinks

Sports & Outdoors

Electronics

Kids & Babies

Books & Publishers

Pets & Animals

CBD

Blogs

Personal Blog

Food & Travel

News & Business

Arts

Fashion & Beauty

Sports & Wellness

Podcast

Wix ADI (Artificial Design Intelligence)

Wix ADI (Artificial Design Intelligence) is another option for making a professional website in just a few minutes using AI technologies, by asking basic questions about the business and website needs.

That’s not all; to collect more relevant information about the businesses, it will crawl through the web and social media accounts.

Based on these answers, it will ask some more questions regarding the design, layout, personal info about the business (name, logo), and additional features like eCommerce, live chat, and many more.

When all the information is collected, ADI technology will create a personalized, ready-made site that can go live with the click of a button.

If you want to tweak some changes, you’ll be able to do that in the ADI editor or move the site from Wix ADI to the Standard DIY editor.

Velo by Wix

Velo by Wix is another option that helps users go into developer mode and build complex web applications with a serverless, secure, and maintained system.

Add custom functionality and interaction by connecting to 100s of APIs. As it is an open development platform, it allows users to use its tools to extend the site’s functionality to other services.

Use the built-in database to manage all your content, code directly into the IDE, or work in your environment for both front-end and back-end events. That’s not all; the Wix editor gives you total control over your design and even optimizes business apps to run on your website.

Wix Pricing Plan

Free Plan

This is for people who want to explore and test-drive Wix Editor to see how it works, before switching to another website builder or CMS or before purchasing any of the listed premium plans.

eCommerce, analytics, and other advanced features are not included in this plan.

You get Wix Ads displayed all over the website.

A Wix subdomain URL-account name.wixsite.com/site address with a Wix Favicon in the URL

500 MB of storage and bandwidth.

Premium Plan

Wix allows individuals or small-sized businesses to create multiple sites using a single account.

Each site should have its premium plan to connect to a custom domain – the first year is free.

It also has a free trial of 14 days money-back guarantee.

The pricing plan is divided into 2 categories

Website Plan

Great for showcasing a professional site

There are 4 types of Plan

  1. Connect Domain – Personal Use, which includes Wix ads, 1GB bandwidth with 500 MB storage
  2. Combo – Building Brand Presence Online, 2 GB bandwidth with 3 GB storage
  3. Unlimited – freelancers & entrepreneurs – attract high-quality traffic, unlimited bandwidth with 10 GB storage
  4. VIP – Immediate Priority Support – Design your professional logo & ready to be used on social media channels, with unlimited bandwidth & 35 GB storage

Business & eCommerce Plan

Essential for accepting online payment

There are 3 types of Plan

  1. Business Basic – build a small eCommerce business, unlimited bandwidth with 20 GB storage
  2. Business Unlimited – companies who want to grow their eCommerce business – unlimited bandwidth with 35 GB storage
  3. Business VIP – Full eCommerce Website – unlimited bandwidth with 50GB storage

Read More
Author DM May 27, 2022 0 Comments
Call Back Request
close slider

    Contact Form
  • Please Tick to Submit"I authorize GoTitNow.in representative to contact me through Email, SMS, Calls. I understand that this will override the DND status on my mobile number and I have no objection for the same."